The Button Saga
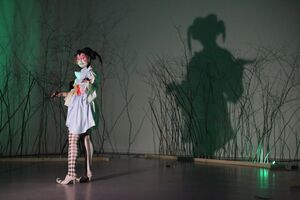
Once upon a time, in 2019, I began exploring non-linear narratives through the format of an immersive and transformative video installation. A year and a half later, Sisters of the Wind was born: an interactive story and installation that weaves together seven videos, a performance, a LARP (live action role play), and a publication.
The core narrative focuses on a community of people living in a world where powerful winds have destroyed most of what was before. Through new belief systems and a strong sense of togetherness, the community has developed a unique relationship to the extreme force of nature. They consider the wind to be a “sister” that holds the power of creation and destruction. They live with the wind. They move with it as it changes the world around them. They use it to carry magic and dreams.
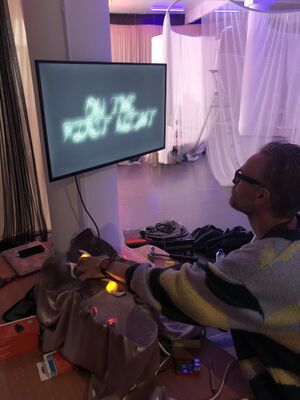
I wrote the story so that the videos can be viewed in any order, as a-temporal fragments of the overarching narrative. Some videos include NPCs (Non-Playable Characters), which hold messages for viewers to interpret in order to steer the direction of the narrative. When the installation was first on show,[1] I personally told the story to visitors, and gave them the opportunity to make decisions as and when needed. After making their choices, I brought them to the video that corresponded with their decision. To begin the video, my lovely partner manually pressed the play button on the remote control of the media player. We would press pause at the end and the videos would be rewound to the beginning in between showings. We did this repeatedly for five days. It was a good way to test whether the format of interactive and non-linear storytelling was working. The direct interaction also helped me to feel comfortable with the performative aspect of storytelling in this way.
When I was invited to show the work again,[2] I took the opportunity to make the work autonomous, and to automate the activation of the videos so I didn’t have to be in the gallery at all times. I wanted to do this using open-source technology as it felt important to develop a technical installation that aligned with my ethics and fit with the spirit of the work which aims stimulate knowledge sharing, collaboration, and community building. These aspects are also at the core of open-source culture. I wanted to do so using Raspberry Pi, a series of open-source computer boards, for which there are an endless range of extremely well-documented scripts. Spoiler alert: I didn’t manage! As the saga unfolds, I will tell you, dear reader, about my journey to make a seemingly simple script function in the open-source world.
My initial intention was to work with sensors that started the videos when a visitor came into close proximity with the device, however I realized that the act of pressing a button would be a lot more fun. Pressing a button gives the impression of activating something—it gives you power.
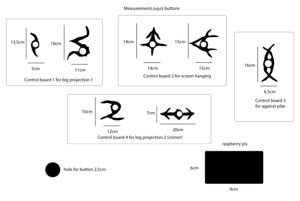
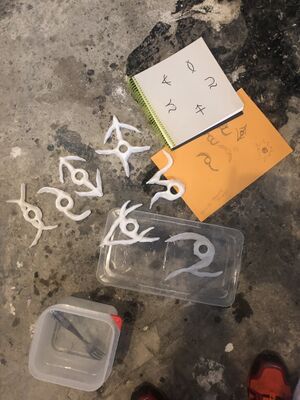
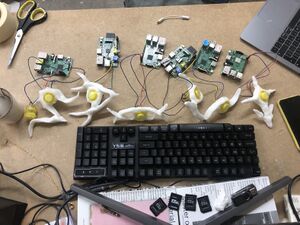
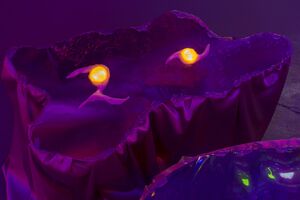
I sculpted seven shapes from thermoplastic that could hold yellow arcade buttons. Technically my idea was simple: The videos were to be distributed spatially and activated by a button.
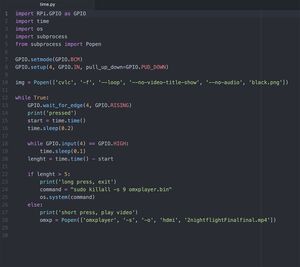
The script would go as follows:
- The screen is black before the video starts.
- If a button is pushed the corresponding video starts.
- At the end of the video the screen turns black.
- If a button is pushed for more than five seconds, the screen goes black again.
The last function was added in the event that someone accidentally pressed the wrong button, as well as for testing purposes, so that we wouldn’t have to sit through the whole video if an error was made. Sounds pretty simple, right?!
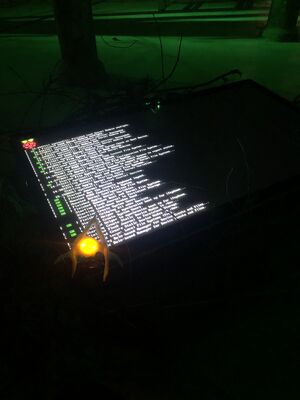
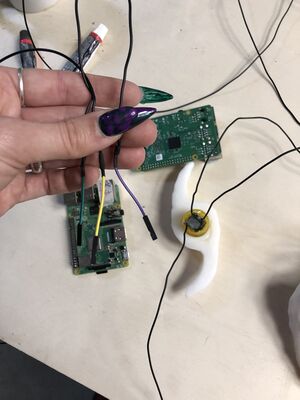
Together with M, who was interning for me at the time, I started looking into how we could make this work. The first obstacle was that there weren’t any Raspberry Pis in stock, anywhere I looked! Eventually, I managed to borrow six Pis: four from H&D and two from M and a friend. The second problem made itself apparent shortly after: all the Raspberry Pis I borrowed were different models. We had two Raspberry Pi 3B+, two Raspberry Pi 4, as well as two older ones. Furthermore, we only had one “official” Raspberry Pi charger, which turned out to be a problem too, but I wasn’t aware of this yet. After finding some resources on GitHub, we combined a few different scripts and had a piece of code that worked on the Raspberry Pi 3B+. We wired the button to the Pi, but it wouldn’t shut down when we tested it, and I wanted to be sure that it would be reliable since it had to work continuously for several days.
Additionally, because all of the Pis were different models and ran on different operating systems (OS), the code didn’t work on all of them. Eventually, M had the idea to duplicate the working SD card so the Pis would run on the same OS and software. In theory it worked, but in practice it didn’t, and I only discovered this when I started testing them. After trying to modify the code and testing again and again, I began to get desperate.
There was always something that didn’t work. For instance, the video had to be played with OMXPlayer, but this program doesn’t read images. In order to have a black screen before the video started, it had to be an image read by VLC, but VLC continuously emitted an error message when used. I tried to read the image with different programs. I tried putting a video on loop that started and ended with a black screen. But nothing fully worked, and on top of that I couldn’t connect the Pis to the Internet. Things were getting more and more complicated.
I asked for help from H&D and other creative coders, but time was pressing on. Everything would be fine if I could find someone to help me for just one day to finish the script and make sure everything worked on the Pis. Eventually, I found someone but they bailed on me the day I arrived in Madrid. Luckily I found someone else: F!
F came to help me the day before the show, while I finished the scenography and AV installation. I wanted F to help me finish my script but instead he made his own script from scratch, which worked great with a ten second video on his Raspberry 4B+. I found this quite annoying because I had gone through great trouble to make my script (sort of) work and I wanted to solve the puzzle, but I had to swallow my pride. If it worked with his script, we were good to go! However, when we put the script on the other Pis it did not work. Eventually, we figured out that the videos were too big for the Pis to hold. Reducing the files to 480p would have solved the issue, but there was no way I was going to do that! At two a.m. on the day before the show I had to tell F to give up because it was becoming too stressful and I was not going to show my work in low resolution. F suggested to source more Pis, which seemed impossible at such short notice and everything being out of stock. But he refused to give up and told me to hand over the files and Pis. He came back the next afternoon with a friend to continue working on it. He hadn’t slept and was on a mission to make it work. Unfortunately, they didn’t succeed. An hour before the show was due to start, J, the curator, bought media players that we used and returned after the show ended.
Eventually, we made the installation work just as it did for the previous edition. J and I executed the scripts with the remote control of the media player. I installed the buttons within the space to see how it looked. A text of the story was printed and given to people at the entrance. Occasionally they had to make a decision, and this was signified by a symbol in the printed version. They had to find the symbols that corresponded with a button at the venue in order to activate the video. When they pressed the button, we pressed play on the remote control! It was interesting to be present in this way and to observe how people were interacting with these objects.
Another challenge I encountered was my ambitious idea to place the buttons far away from the audiovisual source. This meant that we either had to use very long HDMI cables for each channel, or use very long cables to connect each button. In retrospect, the first option was probably the best and most reliable, but I went for the second option. We bought a bunch of black one-thread cables—if you are experienced with electronics please don’t laugh!—and M soldered everything the day before the opening. Each button connected to three cables. We soldered some colored jumper wires at the end of the cables to connect and disconnect from the boards easily, but we didn't have enough of the same color so it became very confusing to remember which should go on which pin. For each button I had to look at where it started and how it was plugged in by referring to a photo I took from the first tests. Some cables were extremely long (up to five meters). When the moment came to plug in and test all the buttons, I was confronted with cable soup. It felt like unmaking infinite braids, seven times over!
I was sad that the full set-up didn’t work, but it was still a good experience overall. The visitors didn’t care about how the technical installation was made, but I was disappointed that I didn’t manage to make it work. I told myself that the the moral of that story is that computers will not yet replace humans—or at the very least, these computers will not be programmed by me!
A few months later, I was getting ready to show an iteration of the work as part of a group show that lasted for two months.[3] It was thus a necessity to make the buttons work. I talked with H about the different options we had. He had worked with museum media players that you could plug buttons into, which was a stable back-up plan. However, it was important to me to make the project function with Raspberry Pis. I was frustrated that I had to constantly rely on proprietary hardware. The media players had terrible interfaces and I couldn’t control much. H was excited to dive into it. He is a genius and knows how and where to look for open-source resources. Predictably, in no time he found an open-source media player software for Raspberry Pi developed by KenT2, which is available on GitHub.[4] FINALLY, IT WORKED! I had to borrow two more of the same Raspberry Pis (3B+) in order to make the installation possible and we had to order some official chargers. It was important that the Raspberry Pis were fed with enough electricity (2.5A minimum is ideal). We created a four-channel installation. Three Pis ran two videos and one Pi ran one.
The fairytale ends happily after all: the seven buttons were touched, pressed, pushed, and tickled by the show’s visitors! For two months the script ran on the four Pis. The soldering lasted with the exception of one button, which disconnected a week before the show ended, but lovely S managed to fix it with my guidance. Following a couple of months rest, the Pis will be put to use once again, and the button saga will continue![5]
How to fix/replace a button!
(Instructions for S, sent on Telegram)
- Look for the box with the materials.
- Check the “broken” button and the Raspberry Pi. Take a photo of how it is plugged in and wired for the next steps. Turn off the Pi (> take away the electricity).
- Find the exact same button in the box. There are a few different ones. Ideally use the same one, otherwise it's OK but you'll have to find out how to wire it by finding the same button on another Pi.
- Unplug button from Raspberry Pi (there are two buttons per Pi except for one. So make sure you have a good photo in case you unplug the other one by mistake).
- Pull the button out of the board (it’s glued but it should be easy to take out).
- Unscrew the button from the ring within the sculpture. It might be a bit tight but not impossible. :)
- Screw the new button into the shape.
- Solder the cables like they were. You may need to make the wires accessible again. You can use a lighter to burn a bit of the plastic.
- Plug the button into the Pi to test if it works (turn it on again, test if the light works, if it plays the video when pressing).
- Unplug the wires again, pass the wires through the hole of the board and fix the button again on the board (maybe put hot glue or double side tape a little bit if needed) and plug it to the Pi again.
- Perhaps add a tiny bit of tape so the wires are not hanging and it’s attached to the board securely.
